
How To Log in To Your WordPress Admin - the Ultimate Guide
If you've recently launched your own website using WordPress, congratulations are in order! Now that you have your site, it's crucial to understand how to log in to your WordPress admin panel.
This backend interface of your website is where you will manage everything, from creating and editing posts and pages to adjusting site functionalities and appearance. If you're unfamiliar with this process, don't fret!
This comprehensive guide will help you navigate the process of logging in to your WordPress admin area, also known as the WordPress dashboard.
TABLE OF CONTENTS
- Understanding WordPress Admin Login
- How to Find Your WordPress Login URL
- How to Log in to Your WordPress Admin
- How to Set up Custom WordPress Login Credentials
- Protecting Your WordPress Admin Login
- Log in using social media accounts
- Set Up Social Login with Google
- Logging in to WordPress from Your Web Hosting Dashboard
- Change Your WordPress Login Page Editing Your .htaccess File
- Adding a Login Link to Your WordPress Website
- Adding A Custom WordPress Login Form in WordPress
- How to Find the WordPress Login URL on a Subdirectory or Subdomain
- What Are the Default Username and Password for a WordPress Site?
- Tips to Remember Your WordPress Login Credentials and URL
- How to Set Up OTP - WordPress Dashboard Login Without a Password?
- Troubleshooting: Is Your WordPress Login Disabled?
- "I Can't Login to My WordPress Dashboard": A Troubleshooting Guide
- Conclusion
Understanding WordPress Admin Login
Before we dive into the step-by-step process, it's essential to understand what the WordPress admin area is.
This is your website's administrative area, where you can customize the website, create new posts, add new plugins, manage themes, handle site settings, and much more.
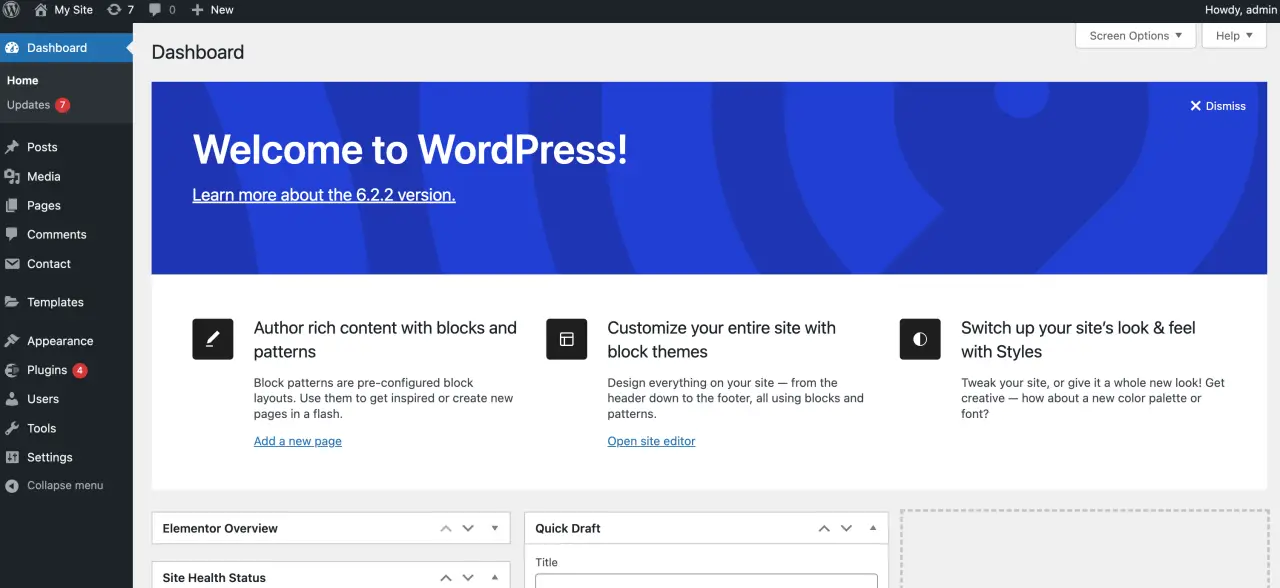
It's called different names like the dashboard, admin area, admin panel, or backend, but they all mean the same thing: the management hub of your WordPress website.
How to Find Your WordPress Login URL
Your WordPress login URL is the route to access your WordPress admin dashboard. Once you've logged in, you can add new content, make design changes, and generally manage your website. Here's how to find your WordPress login URL.
Standard WordPress Login Screen URL
For a standard WordPress installation, you can access the login screen and admin page, by appending /wp-login.php or /wp-admin/ to the end of your site's WP login URL.
For instance, if your website is www.example.com, your WordPress login URL would be:
-
www.example.com/wp-login.php
-
www.example.com/wp-admin/
Once you enter either of these URLs, you'll be taken to the login page where you can enter your username and password to log in.
WordPress in a Subdirectory or Subdomain
If you've installed WordPress in a subdirectory or on a subdomain, your login URL will include the subdirectory or subdomain. For example:
-
If WordPress is installed in a subdirectory called 'blog', the login URL will be www.example.com/blog/wp-login.php or www.example.com/blog/wp-admin/.
-
If WordPress is installed on a subdomain like 'blog', the login URL will be blog.example.com/wp-login.php or blog.example.com/wp-admin/.
Using a Custom Login URL
For security reasons, some website owners change their login URL to something different than the standard /wp-admin/ or /wp-login.php. If this is the case for your website, you will need to recall the custom login URL.
If you've forgotten your custom login URL, you might be able to find it by looking at the email you received when you first installed WordPress, contacting your site administrator, or checking the functions.php file in case the URL was customized through code.
How to Log in to Your WordPress Admin
- Locating the Admin URL: The first step to accessing your WordPress admin area is to locate your WordPress login URL. Generally, the WordPress login URL will look something like this:
http://www.example/wp-admin
Replace example with your actual domain name, and this will direct you to the login page. For instance, if your website is called "mynewblog.com," your WordPress login URL will be
http://www.mynewblog.com/wp-admin
-
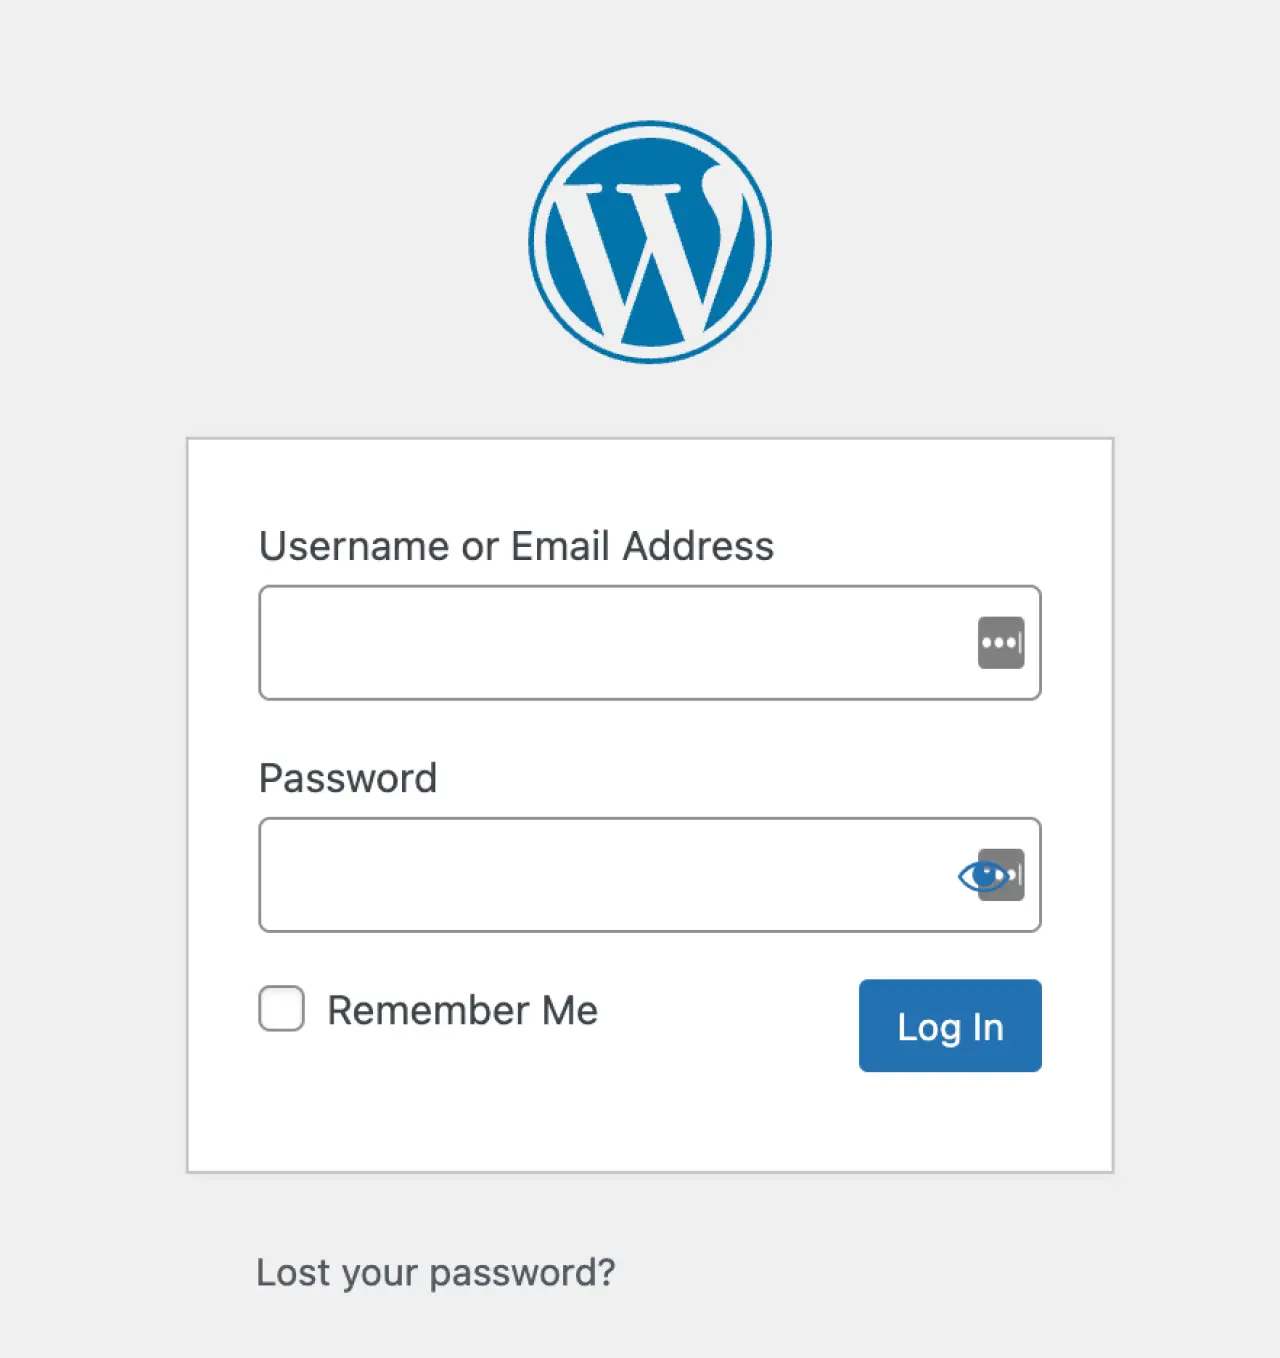
Entering Your Login Information: After navigating to the correct URL, you will see a login page. Enter your WordPress credentials here, which will include a username or email address and a password. These are the details you set up when you initially installed WordPress.
-
Login: Click the button labeled 'Log In', and this will take you to your WordPress dashboard if the credentials are correct. If you're using a private computer, you can click the 'Remember Me' checkbox to bypass typing in your credentials each time.
-
Troubleshooting: If you can't remember your WordPress password, click the 'Lost your password?' link. This will prompt you to enter your username or email address, and WordPress will send a password reset link to the email associated with your account.
How to Set up Custom WordPress Login Credentials
Setting up custom WordPress login credentials helps to enhance the security of your website. By default, during the WordPress installation process, you are prompted to create a username and password. If you need to customize these credentials later, here's how you can do it:
Customizing the Username
WordPress does not allow changing the username from the dashboard. However, you can create a new user with admin rights and delete the old one. Here's how:
-
Go to your WordPress admin dashboard, then navigate to 'Users' > 'Add New'.
-
Fill in the form with the new username and email. Make sure to use a different email than the one used for the existing admin user. You can use a temporary email and change it later.
-
Set the role as 'Administrator'.
-
Click 'Add New User'.
-
Log out from the current user, then log back in with the new user you just created.
-
Go to 'Users' > 'All Users'. Delete the old user (username that you wanted to change). While deleting, WordPress will ask you what you want to do with the content owned by the user being deleted. Make sure to attribute all content to the new user you've created.
-
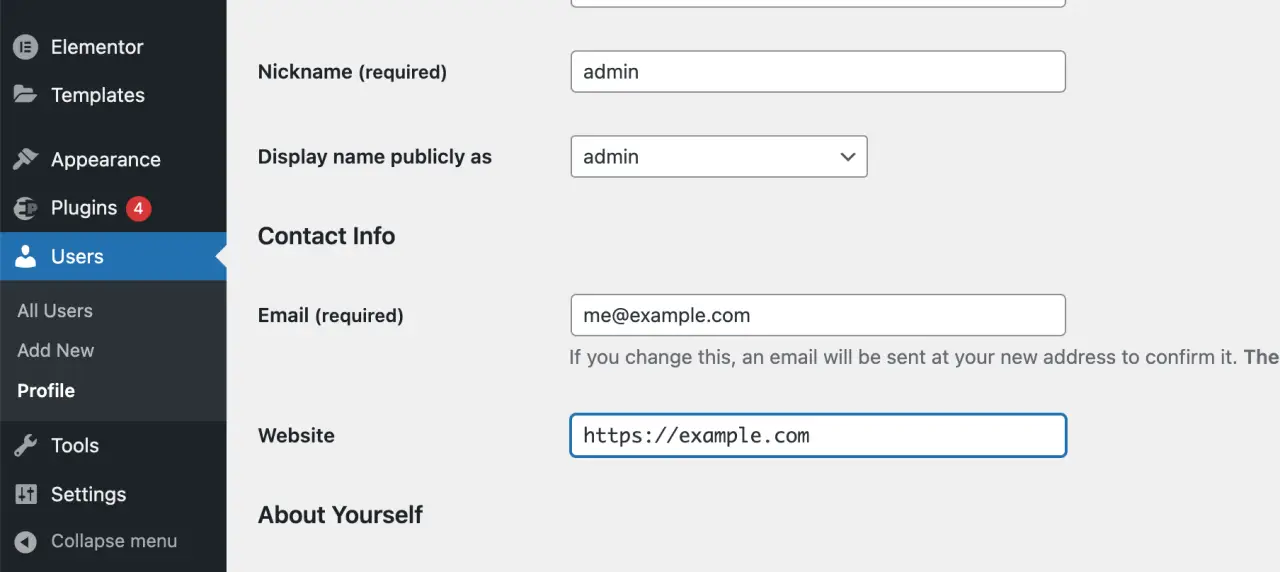
Update the email of the new user (if you used a temporary email in step 2), go to 'Users' > 'Your Profile', and change the email.
Customizing the WordPress Password
If you want to change your password, follow these steps:
-
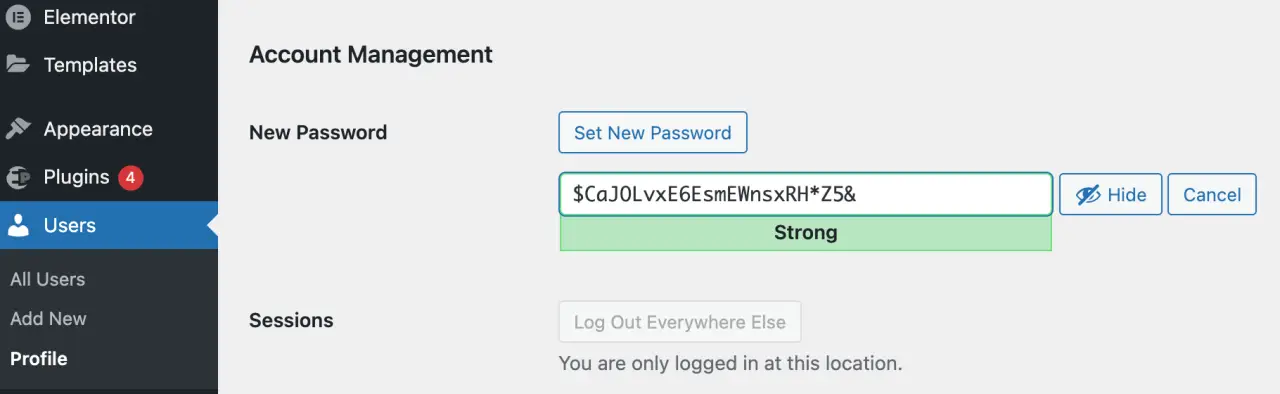
Go to your WordPress admin dashboard, navigate to 'Users' > 'Your Profile'.
-
Scroll down to 'Account Management' section.
-
Click on 'Generate Password'. WordPress will generate a strong WordPress password for you. You can use that or type your new custom password in the box.
-
Click 'Update Profile' to save your new WordPress password.
Remember, it's important to create a strong password that includes uppercase and lowercase letters, numbers, and special characters. This enhances the security of your WordPress site.
Setting up Custom Login URL
For additional security, some site owners might want to customize their login URL. You can do this using a WordPress security plugin like iThemes Security or WPS Hide Login. Here's a simple way to do it using WPS Hide Login:
-
Install and activate the WPS Hide Login plugin.
-
Navigate to 'Settings' > 'WPS Hide Login'.
-
You will see the 'Login URL' option where you can set your custom login URL.
-
Click 'Save Changes'.
If you set up a custom login URL, note it down in a secure location. If you forget it, you will not be able to gain access to your WordPress admin area.
Protecting Your WordPress Admin Login

Your WordPress admin area is a critical part of your site, and it needs to be secure. Here are a few strategies to help protect your login.
-
Use Strong Passwords: Always use a strong, unique password for your WordPress login. This means it should include a combination of upper and lower case letters, numbers, and special characters. Avoid using common words or phrases.
-
Two-Factor Authentication (2FA): Enable two-factor authentication on your WordPress website. This adds an extra layer of security as it requires a second verification step, usually through your mobile phone.
-
Limit Login Attempts: Install a plugin that limits login attempts. This can prevent brute force attacks where hackers attempt to guess your password through continuous login attempts.
-
Update Regularly: Regularly update your WordPress software, themes, and plugins. Outdated versions may have vulnerabilities that can be exploited by hackers.
Log in using social media accounts
You can simplify the login process for your WordPress website by allowing users to log in using their social media accounts.

This not only enhances user experience by streamlining the login process but also increases the chances of user registration as it skips the need for filling out registration forms and remembering yet another username and password.
To set this up, you can use WordPress plugins that support social login, like Nextend Social Login or WordPress Social Login.
Here's a step-by-step guide using the 'Nextend Social Login' plugin:
Step 1: Install and Activate the Plugin
-
Log in to your WordPress admin dashboard.
-
Go to 'Plugins' > 'Add New'.
-
In the search bar, type 'Nextend Social Login' and hit enter.
-
Click 'Install Now' next to the plugin and activate it after installation.
Step 2: Configure the Plugin
-
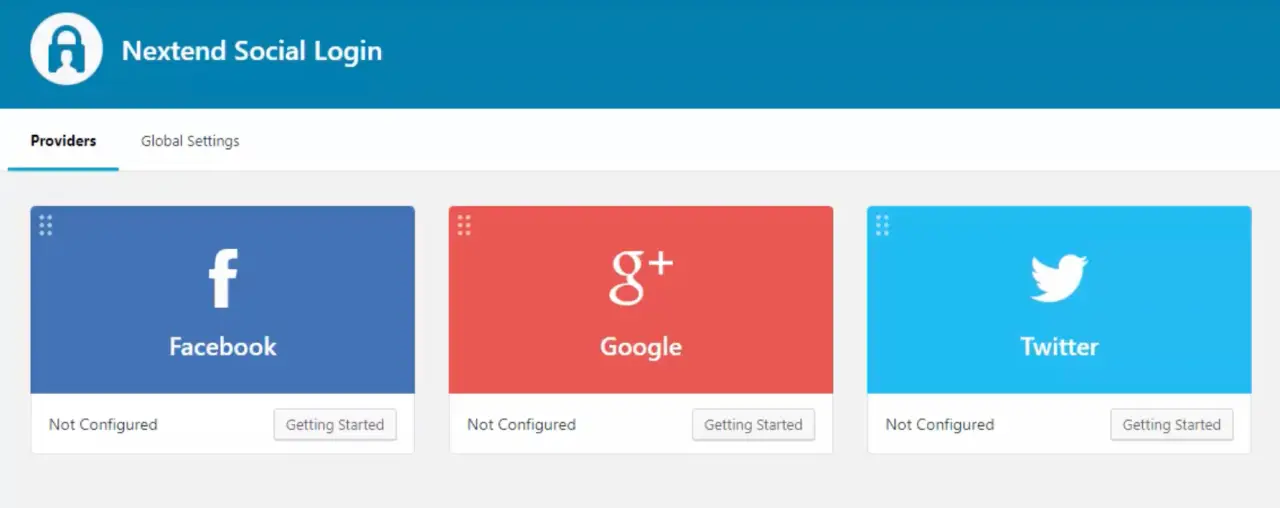
Go to 'Settings' > 'Nextend Social Login'.
-
You will see various social media platforms like Facebook, Twitter, Google, etc. Choose the one you want to enable for social login.
Here's the process for setting it up with Facebook:
-
Click on 'Facebook'.
-
You'll be prompted to enter 'App ID' and 'App Secret'. To get these, you'll need to create a Facebook app.
Step 3: Create a Facebook App
- Go to the Facebook Developers Website and log in with your Facebook account.
-
Click on 'My Apps' and then 'Create App'.
-
Give your app a name and email, then click 'Create App ID'.
-
From your app dashboard, select 'Facebook Login' and set up the platform as 'Web'.
-
In the 'Valid OAuth Redirect URIs' field, paste the URL from the 'Nextend Social Login' settings on your WordPress site. It will look something like:
http://example.com/wp-login.php?loginSocial=facebook
-
Save the changes.
-
Navigate to 'Settings' > 'Basic' in the app dashboard, where you'll find the 'App ID' and 'App Secret'.
Step 4: Configure the Social Login Plugin
-
Copy the 'App ID' and 'App Secret' from your Facebook app and paste them into the corresponding fields in the 'Nextend Social Login' settings on your WordPress site.
-
Save changes.
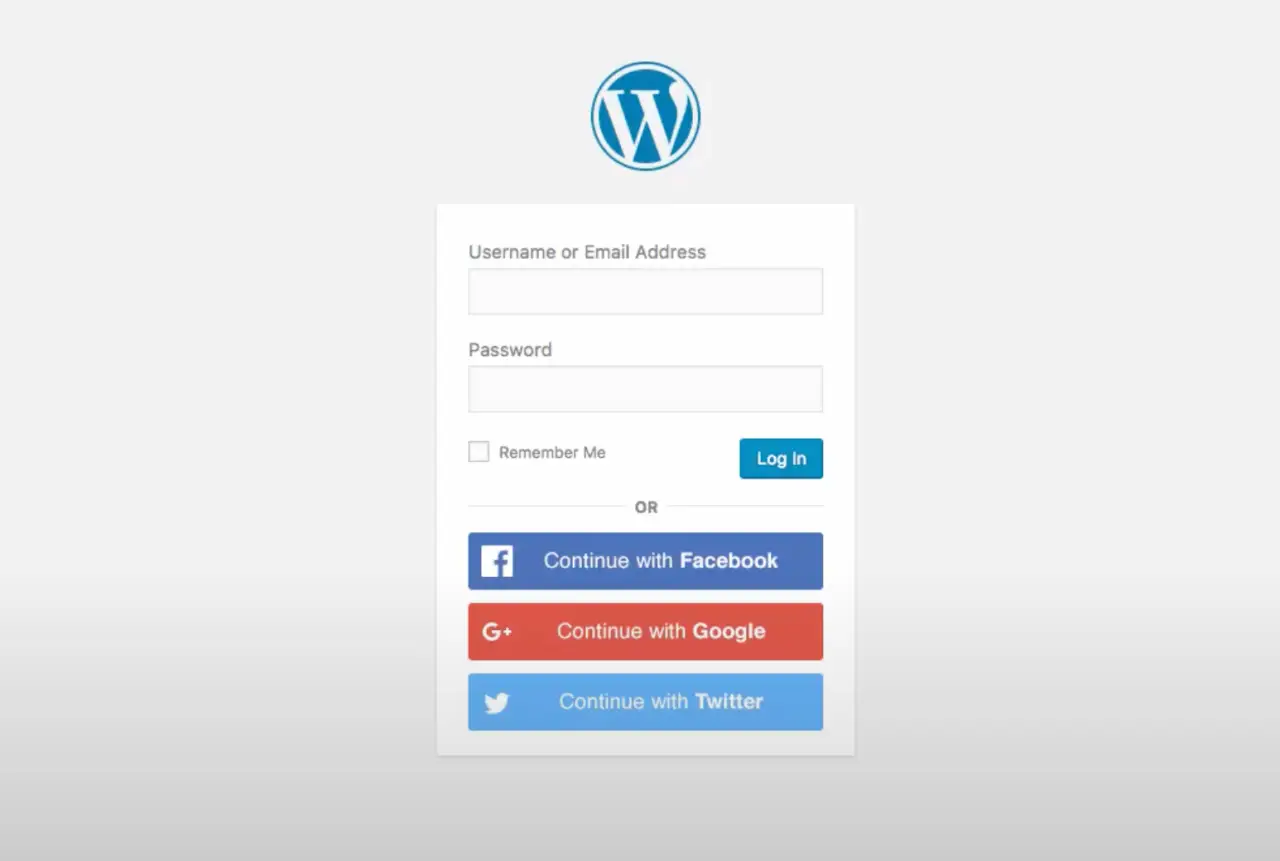
Now, users should see the option to "Log in with Facebook" on your WordPress site's login page. You can follow similar steps to set up login options for other social media platforms on the existing site.
Set Up Social Login with Google
Just like Facebook, you can allow multiple users together to log in to your WordPress site using their Google accounts. To set this up, you'll still need the 'Nextend Social Login' plugin.
Once you've installed and activated the plugin, you can follow these steps to set up Google login:
Step 1: Configure the Plugin
-
From your WordPress dashboard, navigate to 'Settings' > 'Nextend Social Login'.
-
You will see various social media platforms like Facebook, Twitter, Google, etc. Choose 'Google'.
-
You'll be prompted to enter a 'Google Client ID' and 'Google Client Secret'. To get these, you'll need to create a Google API Console project and set up OAuth2 credentials.
Step 2: Create a Google API Console Project
-
Go to the Google API Console and log in with your Google account.
-
Click on 'Select a Project' in the header, then 'NEW PROJECT', and name your project.
-
Once your project is created, select it and go to 'OAuth consent screen'. Choose 'External' and click 'Create'.
-
Fill out the 'App Information' section, including app name, user support email, and developer contact information.
-
Under 'Scopes', you can leave the default settings.
-
In the 'Test users' section, add the email addresses of users who will test this integration.
-
Click 'Save and Continue'.
-
Skip the 'Optional Info' section and click 'Save and Continue'.
-
On the summary page, click 'Back to Dashboard'.
Step 3: Set Up OAuth2 Credentials
-
From the project dashboard, go to 'Credentials' and click 'Create Credentials'.
-
Select 'OAuth client ID'.
-
Set the application type to 'Web application'.
-
Give your credentials a name.
-
Under 'Authorized JavaScript origins', add your website URL.
-
Under 'Authorized redirect URIs', paste the 'Redirect URI' from the Google settings on 'Nextend Social Login' on your WordPress site. It should look something like:
http://example.com/wp-login.php?loginSocial=google
-
Click 'Create'.
-
You'll get your 'Client ID' and 'Client Secret'.
Step 4: Configure the Social Login Plugin
-
Copy the 'Client ID' and 'Client Secret' from your Google API Console and paste them into the corresponding fields in the 'Nextend Social Login' settings on your WordPress site.
-
Save changes.
Now, the "Log in with Google" option should be available on your WordPress site's login page. As with Facebook, this should be an additional option to your standard, login screen below, as some users may prefer not to use their Google account to log in.
Logging in to WordPress from Your Web Hosting Dashboard
Many web hosting companies provide direct access to your WordPress dashboard from their control panels. It's a convenient way to manage your website without remembering the specific WordPress login URL. Here's how to do this in some popular hosting environments:
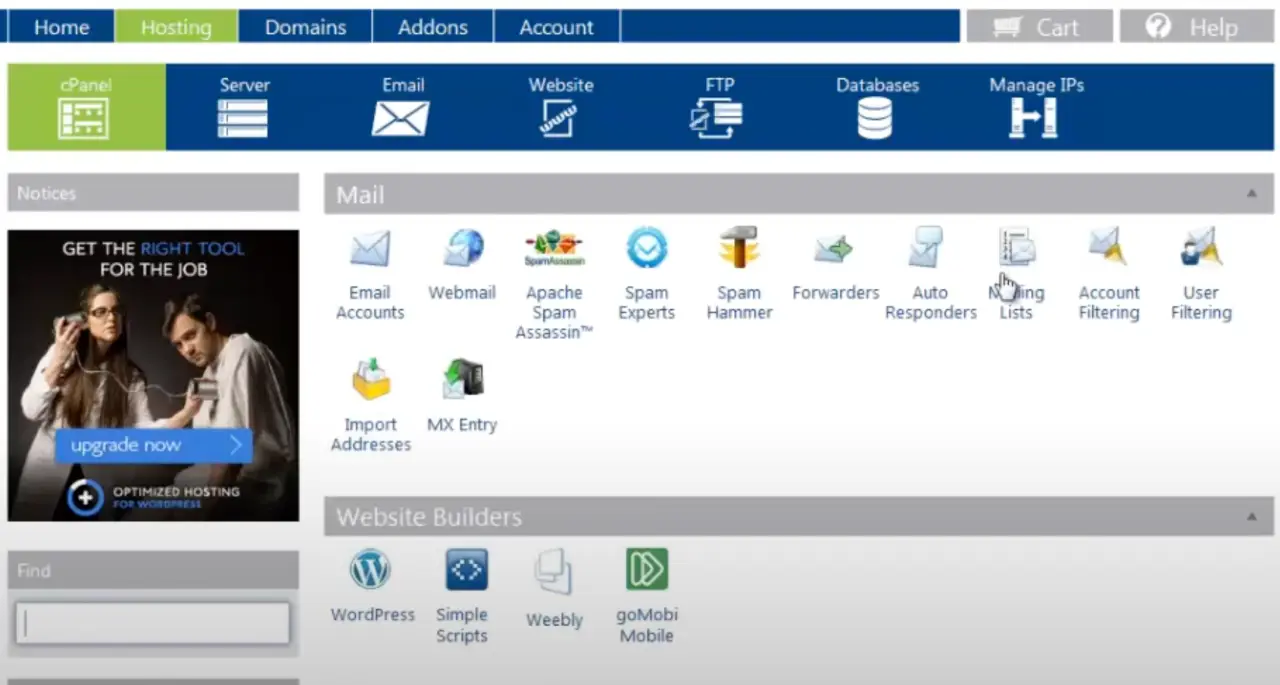
cPanel
cPanel is a commonly used web hosting control panel that provides users with a graphical interface to manage their web hosting.
-
Log in to your hosting account and navigate to your cPanel dashboard.
-
Look for 'Softaculous App Installer' or 'WordPress Installer' under the 'Software' or 'Autoinstallers' section.
-
You will see a list of all WordPress installations. Click on the 'Admin' button next to your website.
-
You will be redirected to your WordPress admin dashboard.
hPanel
Hostinger's custom control panel, hPanel, also provides a straightforward method to access your WordPress admin dashboard. Here's how:
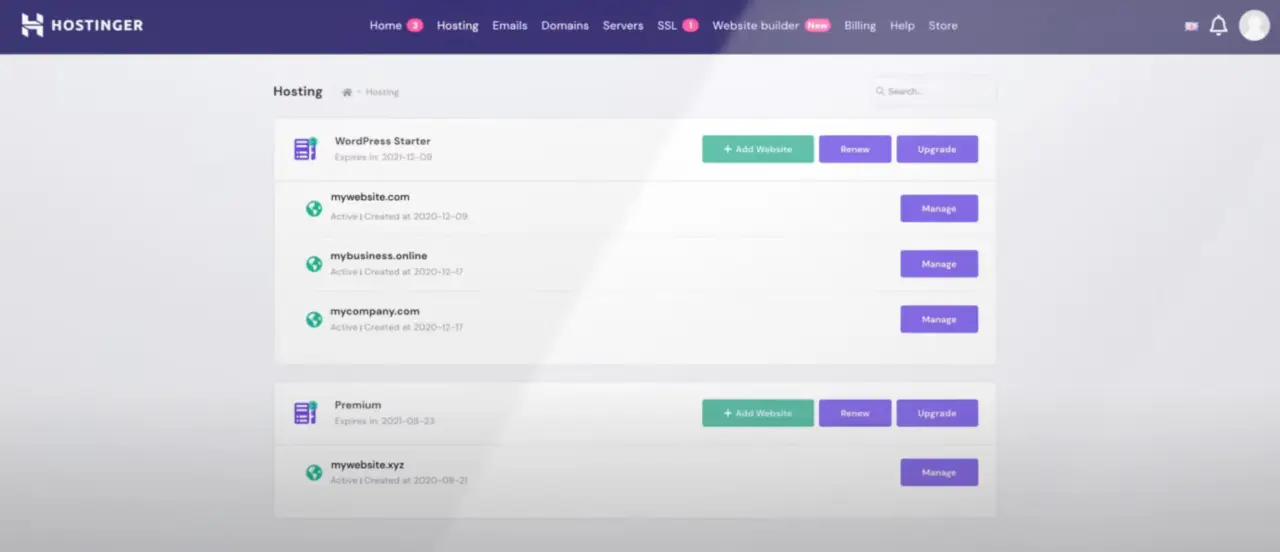
-
Log in to your Hostinger account.
-
From the Hostinger dashboard, locate and select the hosting account associated with the WordPress site you wish to manage.
-
From the hosting account dashboard, scroll down to the 'Website' section.
-
Find the 'Auto Installer' option under 'Website' and click on it.
-
Here, you'll see a list of all your installations. Find your WordPress website and click on 'Manage'.
-
Under 'Website Options', you'll see the 'Admin URL'. Click on it.
-
You will be redirected to your WordPress admin dashboard.
-
Hostinger makes it very easy to access your WordPress admin page directly from its hPanel dashboard, which can be a great time-saver when managing your website. Remember, though, it's also always possible to access the same admin pages and dashboard by adding '/wp-admin' to the end of your website's URL.
Plesk
Plesk is another widely-used control panel among web hosts.

-
Log in to your Plesk account.
-
Go to 'Websites & Domains'.
-
Look for your domain and click on 'WordPress'.
-
Here you'll see the option 'Log in'. Click on it, and you'll be taken to your WordPress dashboard.
Bluehost
Bluehost has its custom panel where you can access your WordPress dashboard directly.
-
Log in to your Bluehost account.
-
In the 'hosting' section, navigate to 'My Sites'.
-
Locate your website and click on 'Manage Site'.
-
Click on 'Log in to WordPress', and you will be redirected to your WordPress admin area.
HostGator
HostGator uses cPanel for their hosting management.
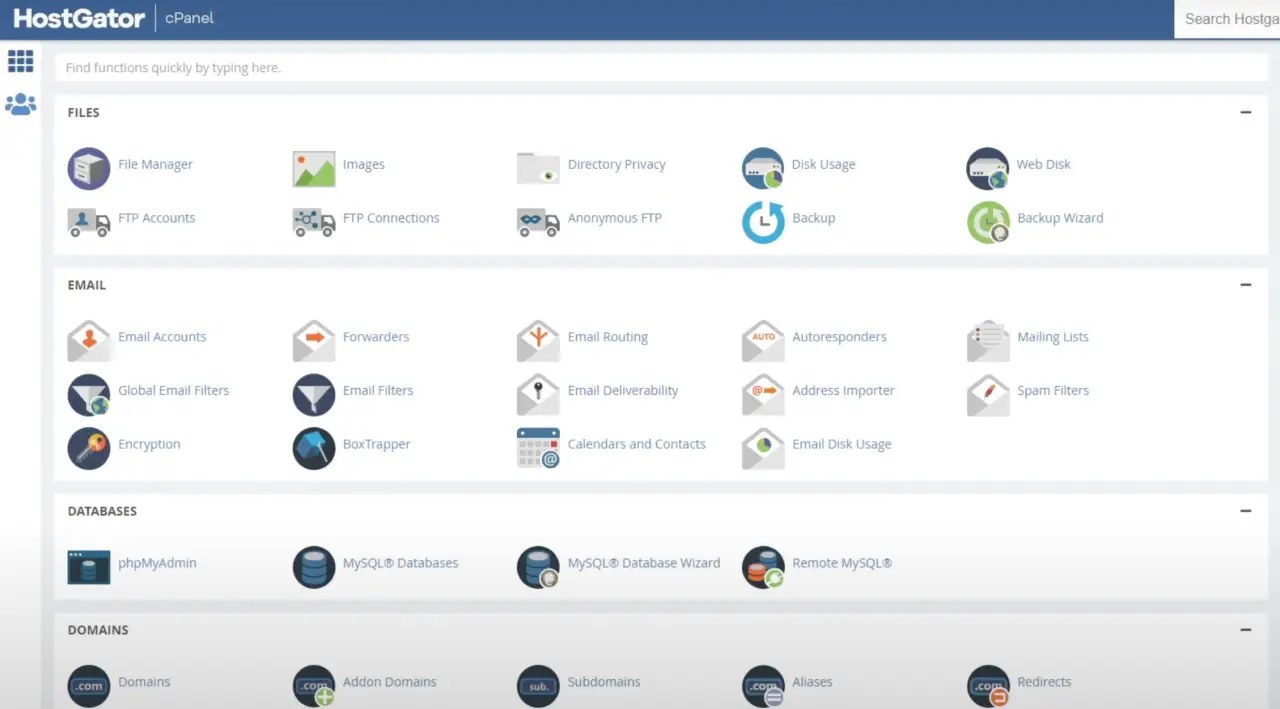
-
Log in to your HostGator account and navigate to cPanel.
-
Look for 'Software' section and click on 'QuickInstall'.
-
Under 'My Installs', find your website and click on 'Admin Login'.
-
You will be redirected to your WordPress admin area.
Please note that the actual navigation labels might slightly vary based on the hosting provider's customization.
Change Your WordPress Login Page Editing Your .htaccess File
Using the .htaccess file to change your WordPress login page URL can enhance the security of your website by making it harder for unauthorized users to find your WordPress login page.
This method, however, requires a bit of technical knowledge and caution, as mistakes in the .htaccess file can cause issues with your site.
Before you begin, it's important to have a backup of your .htaccess file and your website. The .htaccess file is a powerful configuration file and making changes to it can potentially break your website if not done correctly.
Here's how to change your WordPress login page URL using the .htaccess file:
Step 1: Access .htaccess File
-
Log into your website's cPanel or connect to your server using FTP.
-
Navigate to the root directory of your WordPress installation. This is usually named 'public_html'.
-
In the 'public_html' directory, find the .htaccess file.
Step 2: Edit .htaccess File
-
Open the .htaccess file in a text editor.
-
Add the following lines to the bottom of the .htaccess file:
RewriteRule ^mylogin$ http://your-site.com/wp-login.php [NC,L]In this example, 'mylogin' is the first new login page URL you wish to use. You should replace 'mylogin' with the custom login slug of your choice, and 'your-site.com' with your actual website URL.
Step 3: Save Changes and Test
-
Save the changes to the .htaccess file and close the text editor.
-
Open a new browser window and test the new login URL by typing
http://your-site.com/mylogin
in the address bar (replace 'mylogin' and 'your-site.com' with your chosen login slug and actual website URL, respectively).
If you've followed these steps correctly, this should redirect you to your WordPress login page. Remember, any mistake in the .htaccess file can cause your site to become inaccessible, so only use this method if you're comfortable editing core files.
For those who are not confident in manually editing .htaccess, using security plugins like iThemes Security or WPS Hide Login can be a safer alternative to change the login URL. They provide easy and user-friendly interfaces to make the same changes without the need to delve into complex configuration files.
Adding a Login Link to Your WordPress Website
Adding a WordPress login link to your WordPress website can improve the user experience for your website's registered users or administrators, as it provides them with a straightforward way to gain access to the login page. This can be especially useful for websites that allow user registration or for multi-author blogs where multiple people need to log in regularly.
Here's how you can add a WordPress or admin page login link in various parts of your WordPress website:
In the Navigation Menu
-
Log in to your WordPress admin dashboard.
-
Go to 'Appearance' > 'Menus'.
-
If you have more than one menu, select the menu where you want to add the WordPress login link.
-
On the left, under 'Add menu items', click on 'Custom Links'.
-
In the URL field, enter the URL of your login page. It's typically
http://example/wp-login.php
Replace 'example' with your actual domain.
-
In the Link Text field, enter 'Login' or any text you want to display for the login link.
-
Click 'Add to Menu'.
-
Don't forget to save your menu by clicking 'Save Menu'.
In the Sidebar or Footer
-
Go to 'Appearance' > 'Widgets'.
-
Find the 'Meta' widget. The Meta widget includes a login link, along with links to the site's RSS feeds and WordPress.org.
-
Drag and drop the 'Meta' widget into the desired widget area (like a sidebar or footer).
-
If you want to give the widget a title, enter it in the 'Title' field.
-
Click 'Save'.
Using a Plugin
You can use a plugin like 'Login Logout Register Menu' or 'Login Widget With Shortcode' to add a login form or link in your website's sidebar, footer, or navigation menu.
Having a visible login link can be a security concern if your website is a target for hackers. So, it's a good idea to limit login attempts and implement other WordPress security measures to protect your website.
Adding A Custom WordPress Login Form in WordPress
One of the ways you can enhance the user experience on your WordPress website is by adding a custom login form. By using wordpress login form and doing so, you give users the ability to log in directly from the frontend of your website. This guide will show you how to create a custom WordPress login form using a WordPress plugin.
Step 1: Install a Custom Login Form Plugin
Several WordPress plugins can help you create custom login forms, such as 'Theme My Login', 'WPForms', and 'Custom Login Page Customizer'. For the sake of this guide, we'll use WPForms, a versatile form builder that comes with a user registration addon.
-
Install and activate the WPForms plugin. Go to your WordPress Admin Dashboard, click on 'Plugins' > 'Add New', search for 'WPForms', and then install and activate the plugin.
-
Once the plugin is active, you need to install and activate the user registration addon. Go to 'WPForms' > 'Addons' and find the 'User Registration Addon'. Install and activate this addon.
Step 2: Create a Custom Login Form
-
Go to 'WPForms' > 'Add New' to create a new form.
-
Name your form and select the 'User Login Form' template.
-
WPForms will now create a simple login form for you with fields for Username and Password. You can customize the form by adding new fields or deleting existing ones.
-
Once you're satisfied with your form, click 'Save'.
Step 3: Add the Custom Login Form to Your Site
You can add this custom login form to any post, page, blog post or widget area on your WordPress site.
-
If you want to add the form to a page, create a new page or edit an existing one. Click on the 'Add Block' button (the '+' icon), search for 'WPForms', and add the WPForms block to your page.
-
After adding the block, select the custom login form you created from the dropdown menu. WordPress will automatically load your form in the page editor.
-
Publish or update the page to make your custom login form live.
By following these steps, you can add a custom WordPress login form to your website. It improves user experience by allowing users to log in directly from the frontend or blank page, without seeing the default WordPress login screen.
How to Find the WordPress Login URL on a Subdirectory or Subdomain
If you have installed WordPress in a subdirectory or on a subdomain, finding the login URL can be slightly different than a standard WordPress installation. However, it still follows a predictable pattern that is easy to remember. Here's how to find it:
WordPress in a Subdirectory
When you install WordPress in a subdirectory, the login URL will include the subdirectory name. For example, if your website's URL is www.example.com and you've installed WordPress in a subdirectory named 'blog', the URL to access WordPress would be www.example.com/blog.
So, to get to the login page, you would just add /wp-admin at the end of this site's URL. Therefore, the complete WordPress login URL in this case would be www.example.com/blog/wp-admin.
WordPress on a Subdomain
If you've installed WordPress on a subdomain, the process is similar to the subdirectory. You will just need to add /wp-admin at the end of your subdomain's URL.
For instance, if your subdomain is blog.example.com, the WordPress login URL would be blog.example.com/wp-admin.
In both cases, once you reach the wp-admin login page, you can log in by entering your WordPress username and password.
Remember, if you are having trouble remembering these URLs, consider bookmarking them in your web browser. This will give you quick and easy access to your WordPress login page, no matter where WordPress is installed.
What Are the Default Username and Password for a WordPress Site?
When you first install WordPress, you're prompted to create a username and password during the installation process. Therefore, WordPress doesn't have a universal default username and password; these login information credentials are specific to each site and are determined by the site owner or administrator during setup.
For security reasons, it's recommended that you avoid common usernames like 'admin'. Using such a common username can make your site a target for brute-force attacks. Instead, choose a username that's unique and hard for others to guess.
The password you create should also be strong and secure. It should be a combination of upper and lower case letters, numbers, and special characters. Avoid using common phrases or words that might be easy for attackers to guess.
If you forget your username or password, WordPress offers a password reset feature. On the login page, just click on the 'Lost your password?' link.
You'll be asked to provide your username or email address, and a link to reset your password will be sent to the email address associated with your WordPress account.
Tips to Remember Your WordPress Login Credentials and URL
Remembering your WordPress login credentials and site URL can sometimes be a challenge, especially if you're managing multiple WordPress sites. Here are some tips to ensure you always have this information at hand:
1. Bookmark Your Login URL
Bookmarking your site's login URL in your web browser is a simple way to ensure you can always find it. You can organize your bookmarks into folders for better management, especially if you have several WordPress sites.

2. Use a Password Manager
A password manager is a software that stores and manages your passwords securely. It can auto-fill your username and password, saving you the trouble of remembering and typing them each time. Some popular password managers include LastPass, Dashlane, and 1Password. Remember to choose a strong, unique master password for your password manager.

3. Use the 'Remember Me' Option
On the WordPress login page, there's a checkbox option to 'Remember Me'. If you select this option before logging in, the your hosting provider website will keep you logged in for a while, so you don't have to enter your own hosting provider login credentials each time you visit your website. Note that this is advisable only if you're using a private computer.

4. Use Two-Factor Authentication
Two-Factor Authentication (2FA) adds an extra layer of security to your WordPress' login process. When 2FA is enabled, you need a second verification step—usually a code sent to your mobile device—before you can log in to WordPress. This method can help you remember your own login information and credentials because it involves an element of routine and conscious attention to security.

5. Regularly Update Your Password
Changing your password regularly is a good security practice. It's also an opportunity to choose a password that's strong and memorable. A good practice is to use phrases that are easy for you to remember but difficult for others to guess.

6. Use an Email Address for Login
WordPress allows you to log in using your email address instead of your username. Since email addresses are often easier to remember than usernames, consider using this method.
By employing these tips, you'll ensure that you always have your WordPress login credentials and URL at your fingertips. Remember, managing your login information securely can significantly reduce the risk of unauthorized access to your website.
How to Set Up OTP - WordPress Dashboard Login Without a Password?
Setting up a one-time password (OTP) for passwordless login in WordPress is a great way to improve the security of your website. It reduces the risk of password-related security breaches, as users don't have to remember a password that can potentially be cracked or stolen.

In WordPress, you can set up OTP passwordless login using plugins. There are many plugins available, but for this guide, we will use the "Passwordless WP" plugin. Here's how you can set it up:
Step 1: Install and Activate the Plugin
-
Login to your WordPress Admin Dashboard.
-
Navigate to 'Plugins' > 'Add New'.
-
In the search bar, type 'Passwordless WP' and hit enter.
-
Once you see the plugin in the search results, click 'Install Now'. After the plugin is installed, click 'Activate'.
Step 2: Configure the Plugin
-
Once the plugin is active, navigate to 'Settings' > 'Passwordless WP'.
-
You will see several options to customize the settings according to your requirements.
-
You can set the OTP expiration time, the OTP length, and the email subject and body that will be sent to the users.
-
Make sure to save your settings.
Step 3: Use Passwordless Login
-
Go to your WordPress login page. You will see a new field to enter your email address.
-
Enter your email address and click 'Email Magic Link'.
-
You will receive an email with a magic link. Clicking this link will log you into your WordPress dashboard. Remember, this is a one-time link and can only be used once.
That's it! You've successfully set up OTP passwordless login on your WordPress site. Now your users can login without a password, and each time they want to log in to WordPress, they'll receive a new magic link to their registered email address.
Remember to always have other security measures in place on your WordPress site, like regular backups and keeping your themes and plugins updated, to ensure the overall safety of your site.
Troubleshooting: Is Your WordPress Login Disabled?
If you find that the login functionality on your WordPress site has been disabled, it may be due to several reasons:
-
Exceeded Login Attempts: To protect your site from brute force attacks, some security plugins limit the number of login attempts from a specific IP address. If this limit is exceeded, the plugin may disable further login attempts temporarily. You'll need to wait until the lockout period is over or contact your hosting provider to clear the limit.
-
Disabled by a Plugin or Theme: Sometimes, a plugin or theme might interfere with the login functionality. This is especially common with security or user management plugins. Try deactivating your plugins and switching to a default theme to see if this resolves the issue.
-
Issues with Your .htaccess File: The .htaccess file can control access to certain parts of your site, including the login page. If this file has been modified incorrectly, it could disable your login. You can try restoring a backup of your .htaccess file to fix this.
-
Changes in WordPress Core Files: If the WordPress core files have been modified, this can cause problems with your login. You might need to re-upload the WordPress core files to resolve the issue.
-
Changes in User Roles and Capabilities: If your user role doesn't have the capability to access the dashboard, you might see a message that you can't log in to WordPress. You'll need to restore your user capabilities to fix this. This might require direct changes to your database, so be careful or hire a professional to help.
Remember, before attempting to resolve these issues, always back up your site. This will allow you to restore your site immediately if anything goes wrong.
Also, if you're not comfortable with resolving these issues on your own, consider hiring a WordPress professional or contacting your hosting provider's support team for assistance. They will have more experience in diagnosing and resolving WordPress issues.
"I Can't Login to My WordPress Dashboard": A Troubleshooting Guide
WordPress is an incredibly user-friendly platform, but like all technology, it isn't immune to the occasional hiccup. One of the most common issues that users run into is being unable to log in to their WordPress dashboard. Here, we'll explore some of the reasons why you might be having trouble logging in, and we'll provide you with solutions to these problems.
Common Issues and Solutions:
Incorrect Username or Password
This is the most common issue among all WordPress login errors. You might have forgotten your password or you're entering the wrong password or username. If you're unsure about your login credentials, click on the 'Lost your password?' link on your login page. Enter your email address or username, and WordPress will send you a link to reset your password.
Login URL Errors
If you can't remember the exact URL of your WordPress wordpress admin login page, you might be facing difficulties accessing the full wordpress login page below. Remember, the standard URL is www.example/wp-admin. Replace "example" with your actual domain name to access the default wordpress login page.
Cookie and Cache Issues
WordPress requires cookies to work, and if they are disabled in your browser, you won't be able to log in to WordPress. Check your browser settings to ensure that cookies are enabled. Additionally, a build-up of cache in your browser can also cause login issues. Clear your browser cache and try logging in again.
Plugin Conflicts
At times, a new plugin (or an update to an existing plugin) can create conflicts that prevent you from logging in. If you recently added or updated a plugin and then began experiencing login issues, that plugin could be the culprit. Access your WordPress files via FTP and temporarily disable your plugins by renaming the plugins folder. If this solves the problem, you can rename the folder back to 'plugins' and then deactivate each plugin one by one in your dashboard until you identify the problematic one.
Theme Conflicts
Similar to plugins, a newly installed or updated theme can also cause login issues on your login screen. To check if your theme is causing the problem, access your WordPress files via FTP, navigate to /wp-content/themes/, and rename your active theme's folder. WordPress will then revert to the default theme. If you can log in to WordPress now, your theme was causing the issue.
Seeking Professional Help
If you've tried all of these troubleshooting methods and you still can't log in to your WordPress dashboard, it may be time to seek professional help. You can reach out to your hosting provider's support team or hire a WordPress expert. There's also the WordPress Support Forum, where you can ask questions and find answers from the WordPress community.
Conclusion
Understanding how to log in to your WordPress admin area is a basic but crucial skill for managing and maintaining your WordPress website. Remember, the backend of your website is as important as the front end. Keep it secure and update regularly to protect your site from potential threats. Happy WordPressing!
Comments